
Sewing and Hand Application
There are many Swarovski products that are suitable for sewing and embroidering. These products can be easily applied either by hand, or with standard domestic or industrial sewing machine. Swarovski also offers an ideal selection of products for a variety of creative techniques by hand.
Product overview
The following products are suitable for sewing by hand or machine, or for hand application techniques such as beading:
| Product | Sewn by hand | Sewn by machine | Hand application techniques |
|---|---|---|---|
| Beads | ✓ | ✓ | |
| Crystal Pearls | ✓ | ✓ | |
| Pendants | ✓ | ✓ | |
| Sew-on Articles | ✓ | ✓ | ✓ |
| Crystal Buttons | ✓ | ✓ | ✓ |
| Crystal Textures with Foil Overlay | ✓ | ✓ | |
| Crystal Mesh Standard | ✓ | ✓ | |
| Crystal Fine Mesh | ✓ | ||
| Crystal Light Mesh | ✓ | ✓ | |
| Crystal Light Mesh Mini | ✓ | ✓ | |
| Crystal Mesh Colorée | ✓ | ||
| Crystal Mesh Colorée Mini | ✓ | ||
| Crystal Caviar Mesh | ✓ | ✓ | |
| Cupchains | ✓ | ✓ | ✓ |
| Bezel Chains | ✓ | ✓ | ✓ |
| Multirow Cupchains size PP11 | ✓ | ✓ | |
| Multirow Cupchains size PP14 to PP24 | ✓ | ✓ | ✓ |
| Crystal Fishnet Banding | ✓ | ✓ | ✓ |
Machines and tools
The following machines, tools and aids can be used for sewing Swarovski products:

A household sewing machine offers a range of stitch types such as straight stitch, zigzag stitch and a program for sewing on buttons, and is therefore well suited to applying Swarovski products.

An industrial sewing machine is suitable for most sewing applications. However, a machine with a zigzag stitching program is necessary for some Swarovski products.

A button sewer can also be used for the application of some Swarovski Buttons.

Adapted presser feet/beading feet: standard presser feet, adapted by adding two metal plates.

By gluing on small metal plates, an adapted presser foot can be made.

For products with net-edge, a zipper foot is helpful. A button foot can be used for the application of Sew-on Articles.

Sewing machine needles sizes Nm 70–100.

Sewing thread (Nm 50 – 80); stronger synthetic thread is more suitable for sewing on items.

It is recommended that protective eyewear is worn when using a sewing machine, so as to prevent injury.
Suppliers
The following machines and tools are commonly used for sewing and hand application:
- Sewing machines
- Beading foot
- Machine needles
- Sewing threads
- Sew-on settings
If you need help choosing a suitable setup for your application, contact eCrystalHouse. We can review the Swarovski product, carrier material, sewing method, production volume, and machine requirements, then help you select and supply a practical set of compatible sewing tools and materials for sampling or production.
Application
Selecting the optimum thread
When sewing Swarovski products, particularly Sew-on Articles and Beads, synthetic multifilament threads with a thread count of Nm 50 – 80 are most suitable. Monofilament and pure cotton yarns are not recommended due to their limited abrasion resistance.
Selecting the stitch type and direction
In general, Swarovski products can sewn on using a variety of stitch types and direction.
Types of stitch

Multi-row products
Straight stitch
A stitch length should be selected that allows the stitches to fall in the spaces between the cups.

Single-row products
Zigzag stitch
The length and width of the stitch must be adjusted to suit the element being applied. The width of the stitch (B) should be 0.5 mm – 1 mm broader on both sides than the product (A) being applied. The length of the stitch (C) should be equal to about 2/3 of the width of the stitch. In some cases the tension of the upper thread must be reduced. When applying products using a zigzag stitch, the use of an beading foot or adapted presser foot is recommended.

Sew-on Articles
Button sewing program
Sew-on Articles can be applied using a button sewing program. The hole spacing must be selected in order to use the program.
Types of stitch direction


Adjusting the upper thread tension
If the upper thread tension is too tight or too loose, the resulting seam is not strong. The tension of the thread must therefore be adjusted accordingly.


Machine application
Alongside sewing by hand, the following table provides a summary of possible machine application techniques.
| Product group | Variant | Machine | Tool | Program | Note |
|---|---|---|---|---|---|
| Sew-on Articles & Crystal Buttons | Sew-on Articles | Sewing machine | Button foot | Button sewing program or zigzag stitch without feed function | Switch off the lower feed and adjust stitch width to the product. Use of the application tool in some sewing machines can require readjustment of the tension release. |
| Sew-on Articles & Crystal Buttons | Crystal Buttons | Sewing machine | Button foot | Button sewing program or zigzag stitch without feed function | Switch off the lower feed and adjust stitch width to the product. |
| Sew-on Articles & Crystal Buttons | Crystal Buttons | Button sewer | Button sewing program | Holding clamps must be adjusted to the shape of the button. | |
| Crystal Textures | Crystal Textures with Foil Overlay | Sewing machine | Standard presser foot | Straight stitch | |
| Linked Crystal Components | Crystal Mesh Standard / Crystal Caviar Mesh | Sewing machine | Standard presser foot | Straight stitch | Do not remove the transparent support film before sewing. Score the film along the course of the stitching beforehand. |
| Linked Crystal Components | Crystal Light Mesh / Crystal Light Mesh Mini | Sewing machine | Standard presser foot | Straight stitch | Stitching lines of the mesh are set diagonally to the outside. |
| Linked Crystal Components | Cupchains | Sewing machine | Beading presser foot | Zigzag stitch | Adjust stitch width to the product. |
| Linked Crystal Components | Multirow Cupchains for PP14 | Sewing machine | Standard presser foot | Straight stitch | Pre-fix the cups on the fabric and straight stitch the space between cups in the lateral direction. |
| Linked Crystal Components | Multirow Cupchains for PP18 and PP24 | Sewing machine | Standard presser foot | Straight stitch | Pre-fix the cups on the fabric and straight stitch the space between cups in the longitudinal direction. |
| Linked Crystal Components | Fishnet Bandings | Sewing machine | Special presser foot | Straight stitch | Stitch the banding between the rows of crystals using the special sewing feet. |
Application using a sewing machine
The right choice of needle, strength Nm 70–100, sewing thread and thread tension, upper and lower thread, are particularly important for applications with a sewing machine. The fabric must not become gathered and the upper and lower thread should run easily and smoothly.
Tests should be conducted on the original material before beginning production. Before sewing on Crystal Buttons with a machine, set the sewing machine to the correct hole and stitch length as well as stitch width. This prevents the crystal from being damaged during application and reduces the risk of injury.
When sewing high, multi-row products, the sewing-machine feed can be affected by a slanting presser foot. Position a height compensator beneath the presser foot so it sits parallel to the material and the fabric can feed through properly.

The presser foot lies flat due to the height compensator.

A slanting presser foot can cause problems with the feed of the base material.

Switch off the lower feed and adjust the stitch width to the product.

Make sure that the Cupchain runs parallel to the foot.

Stitch the banding between the first and second rows of crystals. Alternatively, use a zigzag stitch. Consider the support-film guidance in Useful Information.

Stitch the bandings between the rows using 3D models of special sewing feet.

Stitching lines of mesh are set diagonally to the outside.

Sewing application in longitudinal direction.

Sewing application in lateral direction.
Consider further details about the support film in the section Useful Information at the end of this chapter.
Application Instruction Movie
Sewing Plastic Trimmings
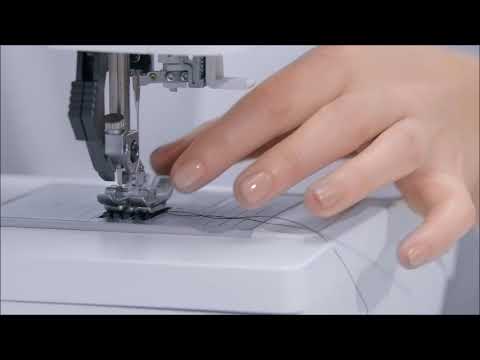
See all Swarovski Application Technique Videos.
Application Advice for Crystal Texture Foil Overlay when using the sewing technique:
Window technique
Benefits:
- this means that even if the product gets buckled, there is no visible gap between the carrier material and the upper surface.
- Saves on cost thanks to the ease of application (no sewing onto crystal-covered areas is required) and less crystals are used because areas are covered by the upper surface material anyway.
A chosen material, such as leather, with a cut-out in the shape of the Crystal Texture Foil Overlay motif is placed over the product. Using a sewing machine, the upper surface material can be sewn together with the Synthetic Foil Overlay.
Due to the fact that the foil overlay comes with Hotfix glue on the reverse side, the Crystal Texture Foil Overlay can be fixed onto a carrier material using the Hotfix technique before sewing the various parts together. The application parameters relating to the relevant product groups apply. The Hotfix Selectors can be found in the chapter Hotfix Application.


Sewing between two materials
Thanks to the foil overlay, the Crystal Textures can now be used between two materials (e.g. leather, fabric,...) without having to be applied to another carrier material beforehand.


“Weaving-look”
Motifs with big foil surfaces (not covered with crystals) can easily be added to carrier materials by using the sewing technique, which makes them look as though they have been woven into other materials.


Create a tube
A tube-shaped product can be created by folding the Synthetic Foil Overlay and sewing it into position. If the tube needs to be stronger and more stable, a cylinder-shaped material such as cord can be added as a core element. This technique is ideal when using a Crystal Texture Foil Overlay tube to create a border on a sleeve or to decorate a fringe on a garment, for example.

Lochrose art. 3129
An innovative product application solution has been developed in conjunction with the companies Laesser and Tajima for the industrial application of Lochrose art. 3129 with fully automatic embroidery machines.
If using a Laesser embroidery machine, the Laesser Crystal Stone Head must be used. The application is based on standard embroidery technology and allows the unique combination of first-class Schiffli embroidery yarns (e.g. SETAFIL®) and crystal applications in a single production stage.
If sewing with a Tajima embroidery machine is preferred, the Tajima Lochrose Embroidery Device is used.
Orders for the Lochrose art. 3129, as well as sample and production orders, can be placed directly with your Swarovski sales partner.


Draw the desired motif.

Enter the design into the embroidery software.

Fill the embroidery machine with Lochrose art. 3129.

Embroidery is carried out automatically using a system like the Laesser Crystal Stone Head (in the photo) or the Tajima Lochrose Embroidery Device.

The embroidered material is now ready for further processing.
Hand application techniques
Some of the Swarovski products listed in the product overview at the beginning of this chapter can be applied by hand. This means a range of creative application techniques in addition to sewing.


Please choose a sufficiently thick wire in accordance to the size and weight of the Swarovski crystals. For heavier products a nylon-coated wire is recommended. Crystal Pearls larger than 6 mm should be additionally knotted for a better hold.
Useful information
Cutting and sewing Crystal Mesh
Before cutting and sewing, the transparent film must not be removed. The film allows the individual crystals to be aligned perfectly, and provides Crystal Mesh with the stability necessary for flawless application. In case the Crystal Mesh is fixed on the fabric with Hotfix prior to sewing, the foil can be removed before starting to sew.
Cutting
Cut the transparent film between the rows of crystals with a knife, but do not pull them apart, otherwise the stability of the crystals will be lost.
After cutting the film, there is some space between the rows which allows you further processing.
Cut the metal mesh with a scissor along the scored line, and remove the excess link rings. The Crystal Mesh is now ready for sewing.
Sewing
When sewing Crystal Mesh, it is recommended that the film is scored along the course of the stitching beforehand (see illustration).
Crystal Fine Mesh cannot be sewn with a sewing machine due to its tight structure.
Application Instruction Movie
Cutting Crystal Mesh
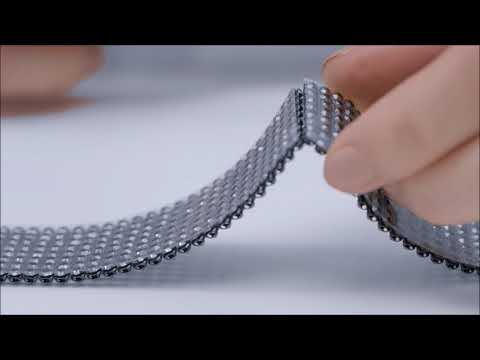
Quick Assistance
The following table outlines typical sewing, and hand application problems, along with possible causes and recommendations on avoiding them.
| Problem | Possible cause reference |
|---|---|
| Product or fabric is not fed through correctly. | 1,2,3 |
| The machine misses out stitches. | 4,5,6,7 |
| The thread breaks. | 4,6,8,9 |
| The needle breaks. | 10,11,12,13 |
| The crystals break out of the cups. | 14 |
Causes and recommendations
| No. | Cause | Recommendation |
|---|---|---|
| 1 | The foot pressure may be too low. | Increase the foot pressure according to the instructions. |
| 2 | There may be dust between the feeder teeth. | Clean the feeder teeth. |
| 3 | Upper feed is faulty. | Replace the upper feed. |
| 4 | The needle may be bent or damaged. | Replace the needle. |
| 5 | The needle is not fitted correctly. | The needle must be pushed right up to the top. |
| 6 | The machine may be threaded wrongly. | Rethread the machine. |
| 7 | The tension of the threads may be incorrect. | Check the thread tension. |
| 8 | There may be knots in the thread or it may be too thin. | Check the thread for faults and if necessary, change it. |
| 9 | The components that form the stitches may be damaged. | Have the sewing machine checked by a specialist. |
| 10 | The wrong needle may have been chosen. | Choose a needle that has the correct size for the carrier material. |
| 11 | The bobbin may not be fitted correctly. | Check the bobbin case. |
| 12 | The needle is too thick and gets stuck in the product. | Use a thinner needle. |
| 13 | The needle hits the crystal. | Sew more slowly and feed the product through the machine carefully. |
| 14 | The needle damages the cup. | Check the length of the stitch and the thickness of the needle. |