
Mechanical Application
Swarovski products, such as Rivets, and Rose Pins can be applied manually or mechanically, using either semi- or fully-automated machines. This simple application technique is used primarily in the textile and accessories fields.
Product Overview
The following products are suitable for mechanical application:
| Crystal Rivets & Rose Pins | Mechanical application |
|---|---|
| Crystal Rivets | ✓ |
| Rose Pins | ✓ |
Machines and tools
The following machines, tools and aids can be used for the mechanical application of Swarovski products:

The fly press (art. 9040/019, with mounting board) represents an easy way to mechanically apply the products.

Vacuum pump (art. 9040/022) with silicone hose allows products such as Rose Pins and Rivets to be easily held in place in the fly press.

Some Swarovski products can be applied using a semi- or fully-automatic attaching machine (e.g. Rose Pins). In this process, the feed on the machine must be adjusted to the product being processed.

For application of Rose Pins a Rose Pin mold can be used (patented by Gruppo Meccaniche Luciani). Please be advised that Swarovski does not provide the tools.

It is recommended that protective eyewear is worn during mechanical application, to prevent injury.
Swarovski offers a variety of different tools for the fly press, depending on the product employed. The tools offered have the following specifications: upper die (M6 screw thread), lower die (12.15 mm + 0.03/–0.10). If using a fly press from a provider other than Swarovski, confirm the thread sizes before ordering the tools.

Crystal Rivets: required application tools
Crystal Rivets can be applied to various materials with or without Back Parts. The correct die combination must be chosen accordingly. Please ensure that the recommended leather or fabric strengths, listed in the “Application” subsection, are followed. A vacuum pump and adapter allow Rivets to be easily picked up and applied. Upper dies are thus available with different thread strengths. When using the Swarovski vacuum adapter, dies with an M8 thread are required. Alternatively, dies with M6 threads are available for presses from other manufacturers, or when not using a vacuum adapter.

Note 1. When using Swarovski's fly press, tools with M8 thread and the corresponding vacuum adapter are necessary.
Note 2. The spare part (plastic insert) is incorporated into the upper die as standard. It should be changed when it becomes worn.
Rose Pins: required application tools
A vacuum pump allows Rose Pins to be picked up and applied. The vacuum connection is integrated directly into the upper die, so an additional vacuum adapter is not necessary.

SS 10

SS 16

SS 20

SS 34
Note 1. The spare part (plastic insert) is integrated into the upper die as standard. It should be changed when it becomes worn.
Note 2. The centering aid (art. 9070/017) allows the product to be positioned in the upper die for Rose Pin 53 301.
Suppliers
The following machines, tools, and aids are commonly used for the mechanical application of Crystal Rivets and Rose Pins:
- Fly press
- Vacuum pump with silicone hose
- Automatic attaching machine
- Tools for Crystal Rivets (fly press)
- Tools for Rose Pins (fly press)
- Rose Pin mold
- Protective eyewear
If you are setting up or refining a mechanical application process for Crystal Rivets or Rose Pins, contact eCrystalHouse for help choosing a suitable machine, tool, and accessory combination. We can review the product type, carrier material, required throughput, and workflow, then help you select and supply a practical setup for testing, pilot production, or regular manufacturing.
Application
Various Swarovski products can be applied using mechanical force, creating a lasting bond with the carrier material.
Checking Material Strength
It is important to carefully check the thickness of the fabric or leather before beginning the application process. With very thick fabrics, a hole can be punched beforehand for the application of Rivets. The fabric should not crinkle or become gathered after application. To check this, carry out tests on fabric or leather scraps before going ahead with the application process. It is also important to make sure that the die sits straight and firmly in the fly press, as this can often cause application problems. It is recommended that you carry out a few test runs to identify the ideal pressure. The offset/pressure can be regulated using an adjustable stop that is fastened to the handle of the fly press.
Product-specific application
Before starting, make sure the fly press is aligned and upper and lower dies are arranged along an axis. Dies should be clean, polished and intact. By carrying out pre-application tests, contracted or crinkled material after the application can be avoided, as well as too much space between fabric and pieces. In order to prevent possible injury, the wearing of protective eyewear is recommended when mechanically applying crystals.
Crystal Rivets
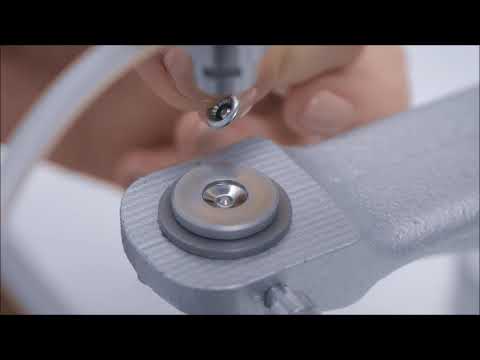
For the application of Crystal Rivets, use a fly press or a semi-automatic attaching machine: The following instructions focus on the application with the fly press. As a first step, attach the appropriate die to the fly press.
Crystal Rivets can be applied on various materials with or without Back Parts. For applications on leather, Stainless Steel Rivets (color code 088) and Back Parts are recommended.
Please note the material thickness when selecting Rivets. The dies should be selected accordingly.
| Art. | Size | Material thickness* | Possible Back Parts |
|---|---|---|---|
| 53 001 | SS 29 | 2.0 – 2.5 mm | 53 007 and 53 009 |
| 53 005 | SS 34 | 2.0 – 2.5 mm | 53 007 and 53 009 |
| 53 006 | SS 39 | 2.2 – 2.7 mm | 53 007 and 53 009 |
* This can vary according to the softness and production of the carrier material.
Application with a fly press
In many cases it is possible to select between both versions of the Back Parts.
For applications on thinner fabrics, it is better to use the larger Back Part (art. 53 007). Its size means this Back Part can better hold the split Rivet shaft, avoiding any damage to the crystal.
For multi-layered or thicker materials, the smaller Back Part (art. 53 009) can be used. To create a lasting bond, this requires less space for the split Rivet shaft. If the carrier material proves too thick, or is made up of several layers, it is recommended to punch a hole before application.

Application Instruction Movie
Rivets - Application with a fly press
See all Swarovski Application Technique Videos.
Rose Pins
Pins can be easily applied using a fly press, a semi- or fully-automated attaching machine. The application with the fly press will be explained step by step. Please note the material thickness when selecting Pins.
| Art. | Size | Material thickness* |
|---|---|---|
| 53 301 | SS 10 | 1 – 2 mm |
| 53 302 | SS 16 | 1 – 2 mm |
| 53 303 | SS 20 | 1 – 2 mm |
| 53 304 | SS 34 | 1 – 2 mm |
* This can vary according to the softness and production of the carrier material.
Application with a fly press

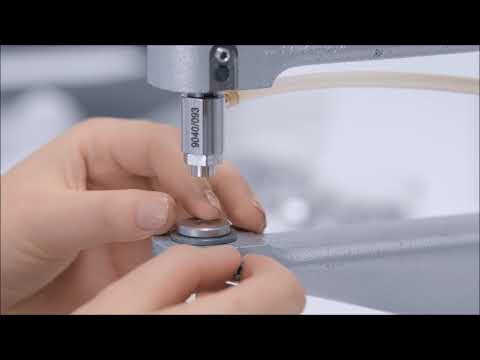
To apply Pins, attach the appropriate die to the fly press.

Place the Pin in the upper die.

Position the carrier material and apply. Regulate the offset/pressure using the adjustable stop.

To facilitate the positioning of the small Rose Pin (art. 53 301, SS 10) in the upper die, the centering aid can be used. The tool must be removed before applying the Rose Pin.
Do not apply Pins on areas of the carrier material that are under high mechanical stress, such as critical parts of a shoe. After application, ensure the Pins are not heated up to more than 80 °C (176 °F).
Application Instruction Movie
Rose Pins - Application with a fly press
Application with a Rose Pin mold
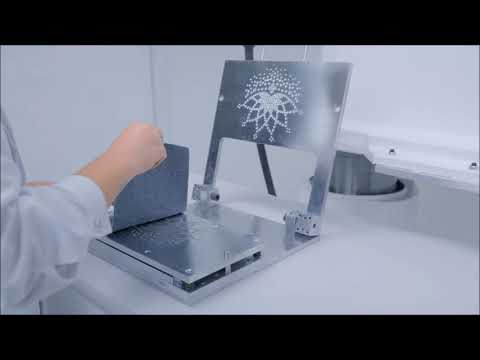
To apply Rose Pins a Rose Pin mold (patented by Gruppo Meccaniche Luciani) can be used. Therefore Rose Pins are sieved into cavities of the lower part of the mold by using PVC masks specific for each diameter/design. In a next step base material is put into the mold. By closing mold and adding pressure by using a hydraulic press Rose Pins are applied onto base material simultaneously in one step.

Place the first PVC mask onto the lower part of the mold.

Sieve Rose Pins into the mask with the claws pointing upwards. Use one mask for each Rose Pin size and repeat the sieving step with all masks.

After having sieved all Rose Pins into the mold, remove the masks.

Put the fabric onto the lower part of the mold. Right side of fabric is facing down.

Close the mold and place it in a hydraulic press.

Press the mold with the hydraulic press.

After pressing, open the mold and remove the fabric with the applied Rose Pins.
Application Instruction Movie
Rose Pins - Application with a Rose Pin mold
Useful Information
Optimum product/die alignment
In general, when carrying out mechanical applications it is important to ensure the proper alignment of products in the dies, so as to avoid any problems.


Minimum gaps
Please note that during application, the product is entirely surrounded by the upper die. To prevent neighboring products from being damaged, check the minimum space required by the die when calculating the gap between each item.


Die maintenance
Please check the dies used before and during production, and change them when they become worn.
For machines with vacuum connections, blockages in the upper die can be released using a needle.
Quick Assistance
The following table outlines typical mechanical application problems, along with possible causes and recommendations on avoiding them.
| Problem | Possible cause reference |
|---|---|
| The product is not ideally affixed onto the carrier material. | 1,2,3,4,5 |
| The fabric ripples or crinkles. | 2,3,4,5 |
| The dies cannot be inserted in the fly press. | 3,6,7,8 |
| It is not possible to unscrew the dies. | 6,8,9 |
| The crystals break. | 2,3,4,5,10 |
| The crystals do not hold in the upper die. | 12,13 |
Causes and recommendations
| No. | Cause | Recommendation |
|---|---|---|
| 1 | The pressure may be too low. | Apply the product again using increased pressure. Adjust the stop. |
| 2 | The carrier material is too thick or consists of too many layers. | With Rivets, select the smaller Back Part. With Rivets a hole can be pre-punched. |
| 3 | The dies/spare parts for the upper die are defective or have been wrongly inserted. | Check the dies and if necessary, replace or repair them. |
| 4 | The product has been applied using the wrong dies. | Check to make sure that the right dies are being used for the product. |
| 5 | The dies have not been inserted correctly. | Make sure that the products are placed exactly in the right position on the dies. By turning the fly press handle slowly, it is possible to see if the upper and lower parts of the tool meet exactly. |
| 6 | The fly press and dies do not fit together. | Make sure that the fly press and the upper die have the same thread size (M6 or M8). |
| 7 | The upper die cannot be fitted. | Check the fastening screw on the upper die. It may have been screwed too tightly. |
| 8 | The die/spare part may be damaged. | Check the dies. If they are faulty use a new die or spare part. |
| 9 | The screw on the upper die has broken off. | Carefully try to loosen the screw using pliers. Oil from time to time. It may be necessary to center-drill the die. |
| 10 | The pressure may be too high. | Apply the product again using slightly less pressure. Adjust the stop. |
| 11 | The die damages the crystal. | Check the dies and if necessary replace the upper die or the spare parts. |
| 12 | The vacuum hose is blocked or damaged. | Check and if necessary change the vacuum hose. |
| 13 | The vacuum hole in the upper die is blocked. | Clean the vacuum hole and if necessary change the spare part. |